

My five top tips for your own food forest
Why a food forest?
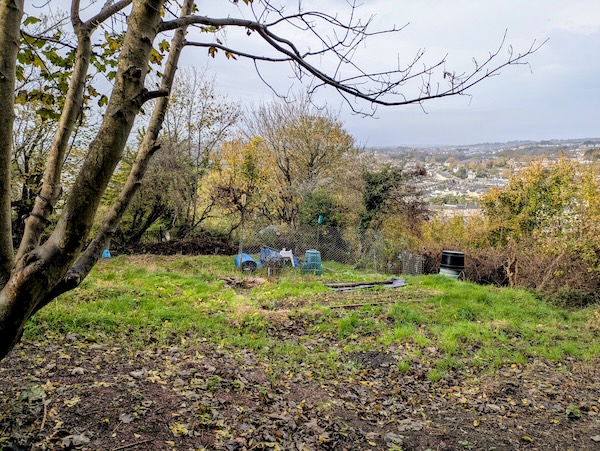
After a wait of six years, I got the keys for my allotment in August 2025. Looking at the plot, I decided pretty quickly that I wanted to step away from traditional annual vegetables and plant it up as a food forest. I had already tried the food forest approach with some success in my small north-facing garden and wanted to see how well it would work in a sunnier but more exposed location.
My food forest is still very young, but it’s full of life and already pumping out small amounts of food. I’m convinced it’s going to be a success and am excited about my food future but I’ve had a lot of learning to do. Six months after my first plantings, I thought I’d share the five most important things I’ve learned about planting a food forest at an allotment.
1. Asking for help makes perfect sense

After weeks of clearing and with an almost blank canvas in front of me, I quickly realised I didn’t know how to plan a bigger scale food forest. I had books and had read plenty of online information but really had no idea about what and where to plant.
It was then that the algorithm gods stepped in and pointed me in the direction of The Solar Farm in Australia. I signed up for Cerise’s free food forest course and loved it so much I paid for a longer, more detailed one. It was a game changer and I came away with a clear plan and plenty of encouragement.
Another way I’ve found help with my food forest is through the online allotment and permaculture communities. They’re a friendly bunch and easy to find. After such a positive experience with an Australian course, I found myself following and chatting to food foresters all over the world.
2. Organise the basics first

Obviously the most exciting part of creating a food forest is planting the trees, shrubs and other plants but there’s more important work to do first and I have since been very glad I listened to advice and got on with it.
- Understand the direction of the sun and plant accordingly
- Create more and wider paths than you think you need
- Design systems to hold water (earth banks, water butts, mulches etc)
My food forest isn’t perfect. For example, some of my plants may cast shade on others as they grow. But my new paths make access to planting areas easy and I’m really pleased with the placement of my ‘dipping well’ water butts (both made from items I found at the plot).
3. It's not just about food plants

The best food forests are burgeoning with food but only if they have the right kind of support. One of the biggest secrets of food forest success is the network of roots and mycorrhizal fungi that runs through the soil sharing nutrients and hormones. This is where support plants come it. If you want this network to do its job, your food forest needs to include:
- Plants that can grab nitrogen from the air and ‘fix’ it in the soil
- Quick growing plants to chop and drop (this also stimulates growth)
- Ground cover plants to help keep water in the soil
My food forest is still young so I currently have a mixture of perennial (e.g. eleagnus and siberian pea) and annual (e.g. field beans and peas) nitrogen fixers. I’ve planted comfrey around the plot for chop and drop mulch, and used a mixture of quick annual vegetables (e.g. turnip and radish) and perennial ground cover plants (e.g. bugle and white nettle). I’m also taking advantage of long-rooted plants like dandelion for chop and drop.
4. It's fine to use what you have

Trees and fruit bushes, even baby ones, can be expensive so you might not be able to plant all of your food forest at once. Here are a few ideas to help you keep the costs and the initial work load down.
- Start small with a food forest ‘guild’ of food and support plants
- Plant bare root trees (much cheaper) in winter
- Learn how to propagate plants with seed saving and cuttings
- Plant annual food and support plants to get you going
My food forest allotment has different areas in varying stages of ‘forest-ness’. I have some ‘traditional’ annual areas but where small trees were already growing, I left everything in apart from small patches I cleared for trees.
My first planting area was a guild with a cobnut tree, a Japanese wineberry, a red currant and a honeyberry. I added a small eleagnus bush and some field beans for nitrogen, and white nettle for ground cover. I also added plenty of cut greenery, small wood pieces and logs when I planted it. It’s thriving beyond my expectations.
5. Pulsing is the new weeding

If you thought planting a food forest at an allotment was a radical idea, you’re going to love this approach to weeds. Instead of pulling weeds out at the root, in food forestry we harness their potential by regular chopping and dropping. This is also called ‘pulsing’ but isn’t just about providing a healthy mulch for our plants:
- Chopped plants release hormones that stimulate extra growth
- These growth hormones are shared through healthy soil networks
- So pulsing benefits the plants around those being chopped
I have included support plants (e.g. comfrey and willow) in my food forest specifically for chop and drop purposes but they need more growth time so instead I’m relying on surrounding ‘weeds’ like dandelion, Alexanders and old man’s beard. I’m regularly pulsing these plants and already seeing the benefits.
My soil is improving and to be honest, I’ve never seen such happy plants. It’s also keeping me fit and helping make the allotment a lovely natural environment for wildlife.
Follow me on Instagram
If you’re thinking about planting a food forest area or even a whole forest garden, why not follow along on Instagram for regular updates, videos (and hopefully some bumper harvests).
Related News
Homegrown food that’s easy and sustainable? Here’s how Allotments in the UK If your mental picture of …

My supermarket free Christmas was my best one in years No supermarkets? At Christmas? But where did we …

I ditched the supermarket in 2023 and haven’t gone back. For me 2023 has been all about switching …
